Cartridge Care
Tips for increasing the life of the cartridge
Each SV2 inkjet cartridge requires simple maintenance to operate at peak efficiency. We want to share a couple of tips that we know will guarantee fewer clogged nozzles and the finest quality traces and definition.
Here's a little cheat sheet that covers the storage of cartridges.
| Type | Storage Temperature | Storage Conditions | Cleaning Solution |
| Insulating Ink (Blue Label) |
Room Temp. 20-25 °C 68-77 °F |
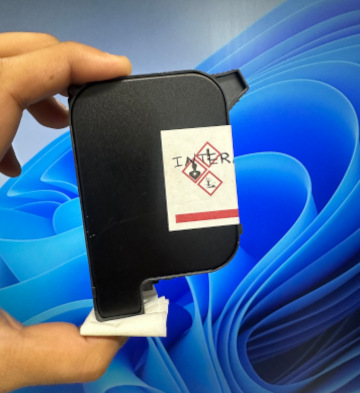
- Keep in the protective clip when not in use - Keep in a cool and dark place |
Isopropyl Alcohol, 90% or higher concentration |
| Conductive Ink (Red Label) |
Room Temp. 20-25 °C 68-77 °F |
- Keep in the protective clip when not in use - Keep in a cool and dark place |
Deionized Water |
- You should always store the cartridge lying flat on its side.
- Wipe the nozzles with a lint-free wipe before clipping and storing the cartridges.
Follow these rules and your cartridge should be safe for at least 6 months or longer. Following the tips below will help a lot as well. Read on!
Tips for a Perfect Print
Follow these steps to ensure a perfect print every time.
-
Check the fill date and the weight of the cartridge
The fill date, usually printed on the side of the cartridge, indicates the cartridge's production date. Cartridges typically deliver peak performance up to 6 months after the fill date. Beyond that, performance may gradually decline. In Addition, measure the cartridge weight without the clip. A cartridge close to 80 gms indicates that it is running low and you might need to get a new one. -
Flick the cartridge on a lint-free wipe
Fold a lint-free wipe and flick the cartridge onto it, as demonstrated in this video. Then, carefully wipe the nozzles. You should see two solid lines of ink appear on the wipe, just like in the video. -
Clean the substrate with IPA
After attaching your substrate to the work surface, clean it with IPA (isopropyl alcohol) to remove any debris or oils. A clean surface is essential for a great print! Contaminants can make the ink stick poorly, leading to blurry or uneven results -
Check print height
For the sharpest possible prints, calibrate your print height. Navigate to the printer's "Utilities and Tuning" menu and select "Calibrate Print Height" following the on-screen instructions. Aim to set the print head as close to the printing surface (substrate) as possible, without any physical contact. Remember, the greater the distance between the print head and the substrate, the more ink diffusion can occur, leading to blurry or unclear prints. -
Check for the nozzle flow test (If you are using the cartridges after a break)
-
For Conductive Ink: Navigate to the "Utilities and Tuning" menu on your printer, select "Print Troubleshooting" followed by "Check Nozzle Performance." Follow the on-screen instructions carefully to run the test.
-
For Insulating Ink: Navigate to the "Utilities and Tuning" menu on your printer, select "Insulating Ink Test" under printing utilities. Follow the on-screen instructions carefully to run the test.
-
If your cartridge fails the nozzle test, read the troubleshooting section below to revive them.
Troubleshooting
When your cartridges are not working as expected
Follow the tips below to troubleshoot a cartridge when it isn't working as expected.
Note: It is important to check the fill date and the weight of the cartridges along with the nozzle flow test before you begin troubleshooting.
Still Can't Print? Warranty or Replacement
If you still are unable to print anything with your SV2 PCB Printer after trying all of these tricks, submit a support ticket here and we will be happy to help you.