Why do you need to calibrate the Tips?
Your SV2 will need to pick the PnP tips whenever a PnP process is taking place. It will automatically swap the tip depending on the size of the component being placed.
The above can't happen if the printer can't pick the tips from the storage slot. By calibrating the tip slot we make sure the tips can be picked from the slot and placed back.
About the Firmware Version
This guide was written for version v2.0.2. If your printer is in an older firmware, please make sure to upgrade.
Follow the steps below to calibrate your tips
1. Make sure you press Cancel before the calibration.
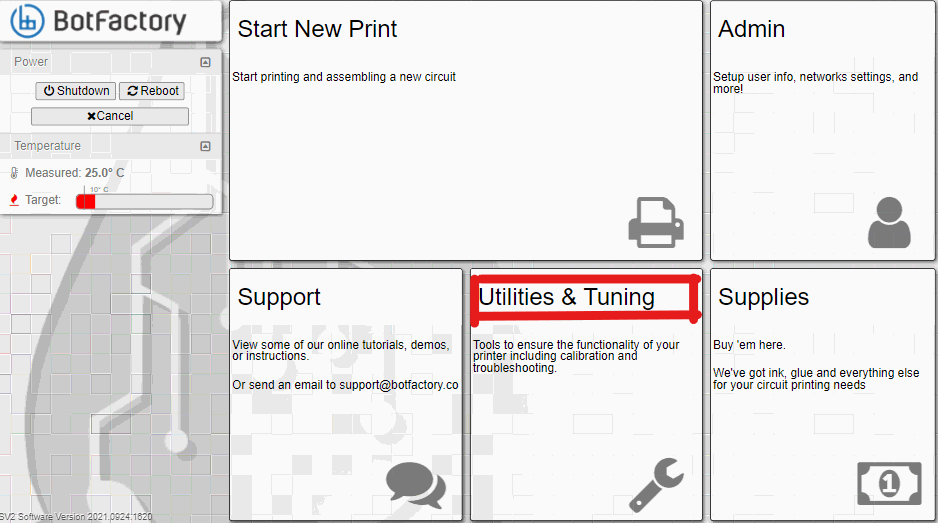
2. Find the utilities box in the main page of the printer, the picture on your right shows where you can find it.

3. Scroll down and click "Calibrate Left PnP Tip."

4. Follow the guide, but keep in mind the following tips:
- Start by attaching the head, then press "Move to X, Y"
- When you press the "Move to Release-Z", make sure there is no contact between the head and the tip. if there is contact, move the head up by using the "R" key on the keyboard. The head should be at least 5mm above the tip.
- Once the head is at the right height, press "Save Release Z"
- Now, adjust X (left/right) position using the A and D keys on your keyboard and the Y (front/back) position using the W and S keys on your keyboard. Make sure the "Tip Holder" on the head is perfectly aligned with the top of the tip.
- Simulate up and down motions to validate alignment. To do so, use "Shift + F" for down motion and "Shift + R" for up motions. When satisfied, click "Save X, Y"
- Setting the "Pickup Height" is probably the trickiest part. If the procedure as explained in the software does not work for you then try the following: Use "Shift + F" to move as low as possible. If the tip didn't click into the tip holder yet, place you hand on top of the head holder and press down as shown in the picture on the right. Make sure you apply most of the pressure on the back of the head holder. Press "F" a couple of times until the stem of the tip is fully inserted in the tip holder. Remove your hand from the head holder and verify the stem is still fully inserted. If not, move further down with "F". Now click "Save Pickup Z"

- Now, after setting Pickup Z, we need to adjust the Slot Z. Use the following tips
- At the "Pickup-Z" height, press "R" 5 times on your keyboard. You should see the tip is still fully attached to the tip holder.
- Press "Shift + W" to move the head as far back as possible. If the head becomes detached, you can press "Shift + S" to return to where you started and press "R" or "F" to adjust the height. The head should be able to move backward and forward without becoming detached.
- Once the head is as far back as it can be, use "Shift + S" to move the head forward and test that the tip slides into the slot. If the head tilts and become detached, move back with "Shift + W" and use "R" or "F" to move up or down, then try "Shift + W" until you can move the tip in and out of the slot without an issue. Then click "Save Slot Z". It is typical that you need to move a little bit higher (press "R" to move up) for it to work well.
- Now that everything has been set, click "Clear Errors" on the top right. Take the tip with your hand and insert it properly in the corresponding slot.
- Verify everything works by clicking "Test Left Pick-up" and "Test Left Drop Off"
- Repeat the above process with the right tip.
